Importing contacts is one of the fastest ways to build your audience in Telerivet. Whether you manage a few dozen people or hundreds of thousands, Telerivet makes it easy to bring in contact data from spreadsheets, databases, registration systems, or other tools you already use.
This guide explains the different ways to import contacts, what happens during the import process, and how Telerivet helps you keep your contact data clean, organized, and ready for messaging.
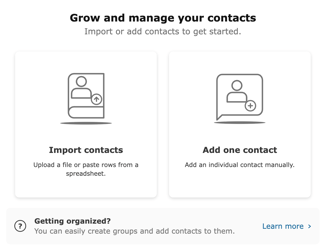
Ways to Import Contacts
Telerivet supports multiple import methods depending on your workflow.
1. Upload a file
Best when working with spreadsheets or exported data. Once uploaded, Telerivet shows a preview and asks you to map your columns to contact fields.
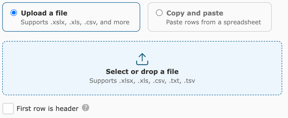
2. Copy and paste
Great for quick imports or when working directly from Google Sheets or Excel.
Simply copy your rows, paste them into Telerivet, and map the columns.
3. Import directly into a group
You can create a group first, then import contacts straight into that group.
This is useful when:
- Bringing in a new segment
- Importing by location or region
- Loading lists from partners or field teams
- Creating a pilot or cohort group
4. Import via API
For automated systems, you can use the Telerivet REST API to create or update contacts programmatically.
Related developer documentation: Telerivet API Reference
Lookup keys and duplicate prevention
To avoid duplicate contacts, Telerivet uses a lookup key.
This is the field used to match rows in your spreadsheet to existing contacts.
Common lookup keys include:
- Phone Number
- Contact ID
- A custom ID your organization uses
If a matching contact is found, Telerivet updates that contact instead of creating a new one.
By choosing the correct lookup key, imports can update existing data without creating duplicates. This is ideal for:
- Refreshing program data
- Updating eligibility or status fields
- Bringing in new survey results
- Adding additional details captured in the field
How the Import Process Works
Each import follows the same general flow.
1. Prepare your dataMake sure each row represents one contact and each column represents one field.
2. Upload or paste your fileTelerivet loads a preview of your data.
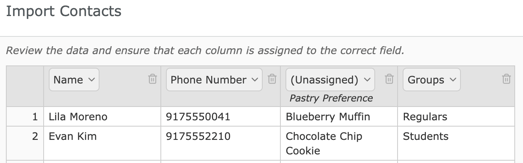
3. Map your columnsYou match each column to:
- An existing field
- A new custom field
- Or click 🗑️ if not needed
Optional: Choose the lookup key
This ensures Telerivet knows when to update existing contacts instead of creating duplicates. Phone number is selected as default key.
Optional: Add contacts to a group
This makes audience segmentation easier later.
4. Review and importTelerivet shows a summary of contacts that will be created or updated.
Tips for Clean Imports
Keep imports smooth by following these simple guidelines:
- Use one row per contact
- Make sure phone numbers include country codes
- Avoid extra spaces or special characters
- Remove empty rows
- Use consistent column names
- Decide your lookup key before importing
- If you need new fields, create them once and reuse them
Updating Contacts Through Import
Telerivet imports can do more than create new contacts. They can:
- Add missing data
- Correct outdated information
- Update status or progress fields
- Enrich profiles over time
As long as the lookup key / phone number matches, the import updates the correct record.
Troubleshooting Import Issues
If something goes wrong during import, it is usually because of:
- Invalid phone number formats
- Missing lookup keys
- Mismatched field types
- Unmapped columns
- Hidden characters or formatting issues in the file
Telerivet will highlight any errors so you can correct them before completing the import
Handing Import Errors 🔸